What is CMMI ?

CMMI is an integrated model framework which consists of many capability maturity models that contain the best process and performance practices and was developed by the SEI of Carnegie Mellon University and its well known as an international advanced improvement model for competitive organizations that want to achieve the best performance of operations.
 
The CMMI has five classifications or levels where each project can be classified into one of these levels where the level is so much progressively hard to achieve and each level builds on to the next level.
To be classified into a CMMI level the process qualifying must meet all the criteria for that level noting that there is a level 0 or incomplete where this level is a representation of the absence or incompleteness of an activity so if we are starting a project we are at least at level 1 of the CMMI.
 
Please find my Publication describing ITWorx as a case study for my research on CMMI :

What are Agile and Scrum?

Agile is a way for getting work done by the
collaborative effort of self-organizing and cross-functional
teams, encouraging flexible response to change.
Scrum is an Agile framework that has been used to manage
work on complex products since the early 1990s. Scrum is
not a process, technique, or definitive method. Rather, it’s
an outline to refer to while employing various processes
and techniques.
Teams complete tasks in set periods of time called Sprints,
typically less than 30 days each, with daily reassessments
of progress and status. This approach is effective in
overcoming obstacles often presented by unexpected
challenges, including evolving customer input.


Authenticate Facebook via Windows Azure Mobile Services


Let’s first understand what does the word authentication means before we go to the technical concept of Facebook authentication.


What is authentication?


It’s a method where the user tries to connect to a certain domain or application so the user needs access to this domain/application here comes the role of authentication. Simply it’s a way to authorize users through a certain domain or application.

Image

Identity Providers

Facebook is an Identity Provider which a user can login through it to be authorized to access an Application and there is a variety of Identity providers like (Microsoft Account, Yahoo ID, Google ID, Facebook and Twitter).

Authentication

To use authentication with windows azure mobile services first you need to have a working Windows Azure Account then go to the portal (http://manage.windowsazure.com) in order to register the application for authentication and to configure the mobile services.

Image

After Logging into the Portal go to the Mobile Services tab and then choose your own mobile service that you’ve created before then click on the Identity

Now a page that has all of the supported identities will appear so that when you pick an Identity Provider for user authentication you must fill in its required fields. 

Image

To add the Facebook settings you must first register your Facebook application from the Facebook Developers site

Go to https://developers.facebook.com/   and if you didn’t register before press on Register Now then the Policy will appear to you read it then accept it and click done.

Now go to apps and press on create new app in order to create the Facebook app that you’ll use to authenticate the users

Image

Write the name of the Application and then press Continue.

Then you’ll be provided the APP ID and the APP Secret Key Copy them and then go back to the mobile service identity page and paste them in the Facebook settings.

Now go to the Data Tab and press on the created Table (ToDoItem) and click on permissions then choose Only Authenticated Users in all the permissions and now your app allows only authenticated users. Now to test your mobile service go to the previously created windows 8 app and add the following authentication code

Go to the MainPage.xaml.cs

Add this to the using statements 

using Windows.UI.Popups;


then add the following code to the MainPage Class

private MobileServiceUser user;
private async System.Threading.Tasks.Task Authenticate()
{
    while (user == null)
    {
        string message;
        try
        {
            user = await App.MobileService
                .LoginAsync(MobileServiceAuthenticationProvider.Facebook);
            message = 
                string.Format("You are now logged in - {0}", user.UserId);
        }
        catch (InvalidOperationException)
        {
            message = "You must log in. Login Required";
        }
 
 
    var dialog = new MessageDialog(message);
    dialog.Commands.Add(new UICommand("OK"));
    await dialog.ShowAsync();
}
 
 
}


And at the end replace the OnNavigatedTo method that implements the new Authenticate Method 

protected override async void OnNavigatedTo(NavigationEventArgs e)
{
    await Authenticate();
    RefreshTodoItems();
}

Now when running the Application it will first ask the user to sign in using Facebook then the user will be authorized to use the application. You can as well use the same mobile service with any other app for example Windows Phone or Android.

Create Your First Windows Azure Mobile Services

Azure SDK


As previously blogged about the features of a windows azure mobile service acting as a backend for the mobile application and what does azure offer developers first of all before creating the first mobile service you need to have Windows Azure SDK if you are going to link your application to the created mobile service which you can find here http://www.windowsazure.com/en-us/downloads/

Image


Where you can find the SDK for the target platform you are using to develop your application


Azure Account


Now it’s time to create your first Azure Mobile Service but in order to do so you must have a Windows Azure working account if you don’t have one you can register for a 90 days trial from http://www.windowsazure.com/en-us/pricing/free-trial/

Note: Internet Card or credit card that supports internet transactions is needed for authentication


Create your first mobile service


First of all you must go to the windows azure account portal from https://manage.windowsazure.com/ and sign in with your Microsoft account than you registered with for windows azure account

Image


Then after going to the portal the previous screen appears with all of the services you’ve created choose new and select mobile service

Image


After selecting create the following windows will appear for you to enter the URL for your mobile service and choose if you want to create a new Database and its region

Image


Then press next to take you to the next page which you’ll specify the DB settings and then press finish to create your mobile serviceImage


Once you’ve done these steps you’ve successfully created your first mobile service then what you can do next is to either link it to an existing application or create a new application via the mobile service which will create for you a simple ToDo list application for the target platform that you choose and create a todo table for your application to store the items the user enters via the mobile service.


 Image

Windows Azure Mobile Services

Windows Azure Mobile Service


Image


As the whole point of cloud computing as a theory is to migrate the processing power away from the device as when for example when doing a task that takes a lot of processing like searching in a lot of data or processing a large image where this task will take a lot of time on the device but if the processing is done outside the device and the result was returned then that would be using the processing power as a service and will be a well use of the cloud computing and that’s what’s azure mobile services is all about.

Windows Azure mobile service is simply a service that runs on the mobile device and then a request is sent to the cloud (Windows Azure) with the data that needs to be processed or the task that needs to be executed and then the processing process happens on the cloud and the mobile service waits for the result until the processing process is done and the result is sent back to the mobile device.

Mobile Services also are used to store data in a windows azure SQL database which was formerly known as (SQL Azure), Azure Tables or BLOBs.


Reaching every platform


Windows Azure Mobile Services supports a lot of mobile platforms that are commonly used now a days like Android, IOS, Windows Phone and Windows 8 so using windows azure SDK you can reach every 1 of these platforms via the RESTFUL API and also it connects multiple client apps to the same mobile service as a backend.

Mobile Services Features


Windows Azure Mobile services has lots of features to support developers that depend on azure as a backend for their applications, the most popular features are push notifications and authentication.

Push Notifications


Notification is a way of delivering a message to the user of a certain system by using software and maybe hardware features to notify him/her about a new update in the system for example when received a new e-mail a notification appears on the screen and plays a sound so that the user would be alert to the new mail that have been received.

Most of the new social networks and e-mail clients now a days use the notifications system as they want their users to be updated with the new updates they have like Facebook, Twitter, Google plus, Windows Live, …etc.

Windows Azure mobile service has built a push notification hub for the developers to make the mobile application users be familiar with the latest updates and notify them with the most important data/updates so it’s easily implemented in the Windows Store, Windows Phone, Android and IOS applications. 

Image


Authentication with well-known Service providers


A lot people that want to access their services on the cloud must go through an authentication process where each user trying to access the services on the cloud must be authorized with an access specially that users accessing these services are from different identity providers.

That’s why Windows Azure made authentication to well-known identity providers like Facebook, Twitter, and Microsoft Account more easily through mobile services just by registering on the wanted identity provider developer website and asking for a token for the application and adding it to the mobile service the user can then be authenticated through the mobile service.


Live Tiles

What are live tiles ?
Windows 8 live tiles is a feature for Modern UI apps that uses the internet to bring live updates to users of Windows 8.

Why live tiles ?

Live tiles exist on the Windows 8 start screen, and are useful for having instantaneous information on constantly changing data like stock indexes, international weather, as well as local and international news as they request the notifications without opening the application.

How does the tile change ?!

The tile is updated when the application sends a TileNotification followed by updating the tile via TileUpdateManager.

Image

How can we use the Live Tiles ?!


Local

  By adding the text and the image you want to be on the tile to the solution.

Image

Through Internet

  By adding images through the internet and your text on the tile.

Image

Through a Web Service

  Via NotificationChannelManager by getting the data from the service URI

Image

To use the Live Tiles Notifications without a Web Service is easier as you put your content directly by referencing them and passing them to the update function but using a Web service is much more time saving as to be used in other applications and scales down the size of the app.

Where to begin ?

Use the NotificationsExtensions Library which is a premade library with Tile objects pre-defined to help developers you can find it in the Windows SDK Sample which illustrates the whole theory of the live tiles.

http://code.msdn.microsoft.com/windowsapps/App-tiles-and-badges-sample-5fc49148

How to add an App Bar to your Windows store App

What is an App Bar ?

It’s a sliding bar from the bottom or from the top that contains controls or settings for your application that can be hidden away when they aren’t needed.

How to add an App Bar ?

To add an app bar to your app, assign an AppBar control to the TopAppBar or BottomAppBar property of a Page. Top app bar can be used to show navigation in your app, Bottom app bar can be used to show commands and tools.

Add the following XAML Code to your page (BottomAppBar Component):

<Page.BottomAppBar>

<AppBar x:Name=”bottomAppBar” Padding=”10,0,10,0″>

<Grid>

<StackPanel Orientation=”Horizontal” HorizontalAlignment=”Left”>

<Button Style=”{StaticResource EditAppBarButtonStyle}” Click=”Button_Click”/>

<Button Style=”{StaticResource RemoveAppBarButtonStyle}” Click=”Button_Click”/>

<Button Style=”{StaticResource AddAppBarButtonStyle}” Click=”Button_Click”/>

</StackPanel>

<StackPanel Orientation=”Horizontal” HorizontalAlignment=”Right”>

<Button Style=”{StaticResource RefreshAppBarButtonStyle}” Click=”Button_Click”/>

<Button Style=”{StaticResource HelpAppBarButtonStyle}” Click=”Button_Click”/>

</StackPanel>

</Grid>

</AppBar>

</Page.BottomAppBar>

Image

Standard Styles

The app bar button styles used in these examples are located in the StandardStyles.xaml file which is included with every Microsoft Visual Studio project template. By default, the app bar button styles are commented out in StandardStyles.xaml.  To use a style, you must un-comment the Extensible Application Markup Language (XAML) for the Style resource you want in the file.

Handling Button Click events

Now after adding the AppBar component in the XAML code one thing is left which is to handle the Button_Click event and for different buttons we’ll use different events

Just add

private void Button_Click(object sender, RoutedEventArgs e)

{

//Button Function

}

Adding a Privacy Policy to your Application + About Page using the Settings Charm

After developing your windows 8 application here is one of the most important things to add to your application which is the Privacy Policy.

What is a Privacy Policy ?

Privacy policy is a statement or a legal document (privacy law) that discloses some or all of the ways a party gathers, uses, discloses and manages a customer or client’s data.

Why Privacy Policy ?

Privacy policy is a way to protect the application users data so that it wont be stolen or misused by the application developer.

One of the Windows 8 Application Certification Requirements is to add a privacy policy to your application.

How to add a privacy policy ?

Now I’ll show you how to add a privacy policy to your application and an about page using the settings charm.

Firstly write your privacy policy and upload it online so that you an add it (recommended) or you can use a generic privacy policy 
http://www.freeprivacypolicy.org/generic.php

Second after finishing your project right click your project in the solution explorer and choose Add > New item

then choose user control and rename it to “About.xaml”

Image

then in the XAML page created copy and paste the following code in the grid tag

<Grid>

<StackPanel>

<TextBlock Text=”App Name” FontFamily=”Segoe UI” FontWeight=”SemiLight” FontSize=”26.667″ /> <TextBlock Text=”Version-1.0.0.0″ FontFamily=”Segoe UI” FontWeight=”SemiLight” FontSize=”18″ />

</StackPanel>

</Grid>

replace the “App Name” with the name of your application later on

now we’ll need to add the function that will display the user control we created when we press the settings charm so we’ll just edit the App.xaml.cs file

as a prerequisite you need to install Callisto which is a library that has a set of controls that will help you in your development you’ll find it here 

http://visualstudiogallery.msdn.microsoft.com/0526563b-7a48-4b17-a087-a35cea701052

after installing it just right click the References in the Solution explorer and choose add a reference then in the search type Callisto then add it

Image

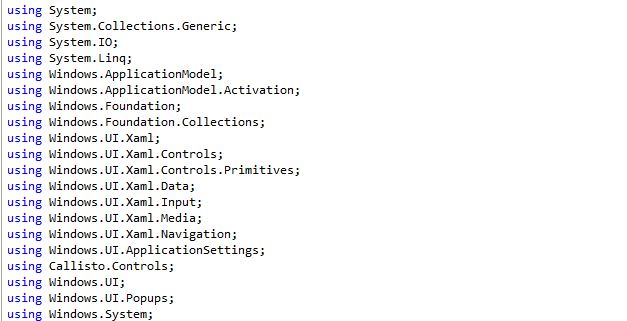
now go to App.xaml.cs and add the following namespaces in the beginning of the file

 using Windows.UI.ApplicationSettings;

using Callisto.Controls;

using Windows.UI;

using Windows.UI.Popups;

 using Windows.System;

Image

Now , Add the following field to the App class.

private Color _background = Color.FromArgb(255, 0, 77, 96);

Image

Now, Add the following statements to the OnLaunched method

SettingsPane.GetForCurrentView().CommandsRequested += OnCommandsRequested;

Now, Add the following event handler to App.xaml.cs

void OnCommandsRequested(SettingsPane sender, SettingsPaneCommandsRequestedEventArgs args) { // Add an About command   var about = new SettingsCommand(“about”, “About”, (handler) =>   {      var settings = new SettingsFlyout();      settings.Content = new About();    settings.HeaderBrush = new SolidColorBrush(_background);      settings.Background = new SolidColorBrush(_background);      settings.HeaderText = “About”;      settings.IsOpen = true; });  args.Request.ApplicationCommands.Add(about); // Adding a Privacy Policy var privacy = new SettingsCommand(“privacypolicy”, “Privacy Policy”, OpenPrivacyPolicy); args.Request.ApplicationCommands.Add(privacy); }

Now add the OpenPrivacyPolicy method:

private async void OpenPrivacyPolicy(IUICommand command) {    Uri uri = new Uri(“http://Add A Link for your Privacy policy”);    await Launcher.LaunchUriAsync(uri); }

Image

now when you open the application press the settings charm and you’ll find the 2 options added Privacy Policy and About

Image

Image

Change your windows 8 Application Tile Logos and the Splash Screen

For any windows 8 application there are 3 Standard Tile Logos which are :

Logo.png

its the main tile logo for the application and its dimensions is  150 x 150 pixels

WideLogo.png

its a wide tile logo for the application and its dimensions are 310 x 150 pixels.

SmallLogo.png

its a small logo for the application and its dimensions are 30 x 30 pixels.

besides these there is the StoreLogo.png

which is the logo for the application when its uploaded on the Windows Store and its dimensions are 50 x 50 pixels.

and the SplashScreen.png

its the Splash Screen which appears in the start (beginning) of the application launch and its dimensions are 620 x 300 pixels.

You’ll find the Logo.png, SmallLogo.png and StoreLogo.png are created with any Windows Store project created with a template icon which can be found in the Assets folder

Image

Image


you can edit them with your own application logo and splash screen or you can edit them by your own files and reference them through the Package.appxmanifest file which you’ll find below the files in the solution explorer 

Image


Just double click it and it will open the file which has all of the deployment package properties the first tab which is selected is the UI which has all of our UI Properties

you’ll find the Tile properties which has all of the logos and the tile background color you can easily change any logo by pressing the browse button next to the URI button of every logo and through here you can also add the Wide Logo 

Image


and when you scroll down you’ll find the Splash Screen part which has the properties of the splash screen and its path you can press on the browse button and choose your splash screen and you can change its background color from here also

Image


to change the background color of the logos or the splash screen you just write its Hexadecimal Value for example

black is #000000 

you can choose the color you want in hexadecimal through this site

http://www.mathsisfun.com/hexadecimal-decimal-colors.html

N.B

When you add a wide logo it becomes the default start tile and you can make it smaller by choosing smaller from the Start AppBar.